Installing a weedmat is one of the most effective ways to control weeds and maintain a clean, tidy garden bed. Whether you’re planting new flowers or vegetables, weedmat helps prevent weed growth while allowing water and air to reach your plants.
✅ Step-by-Step Instructions:
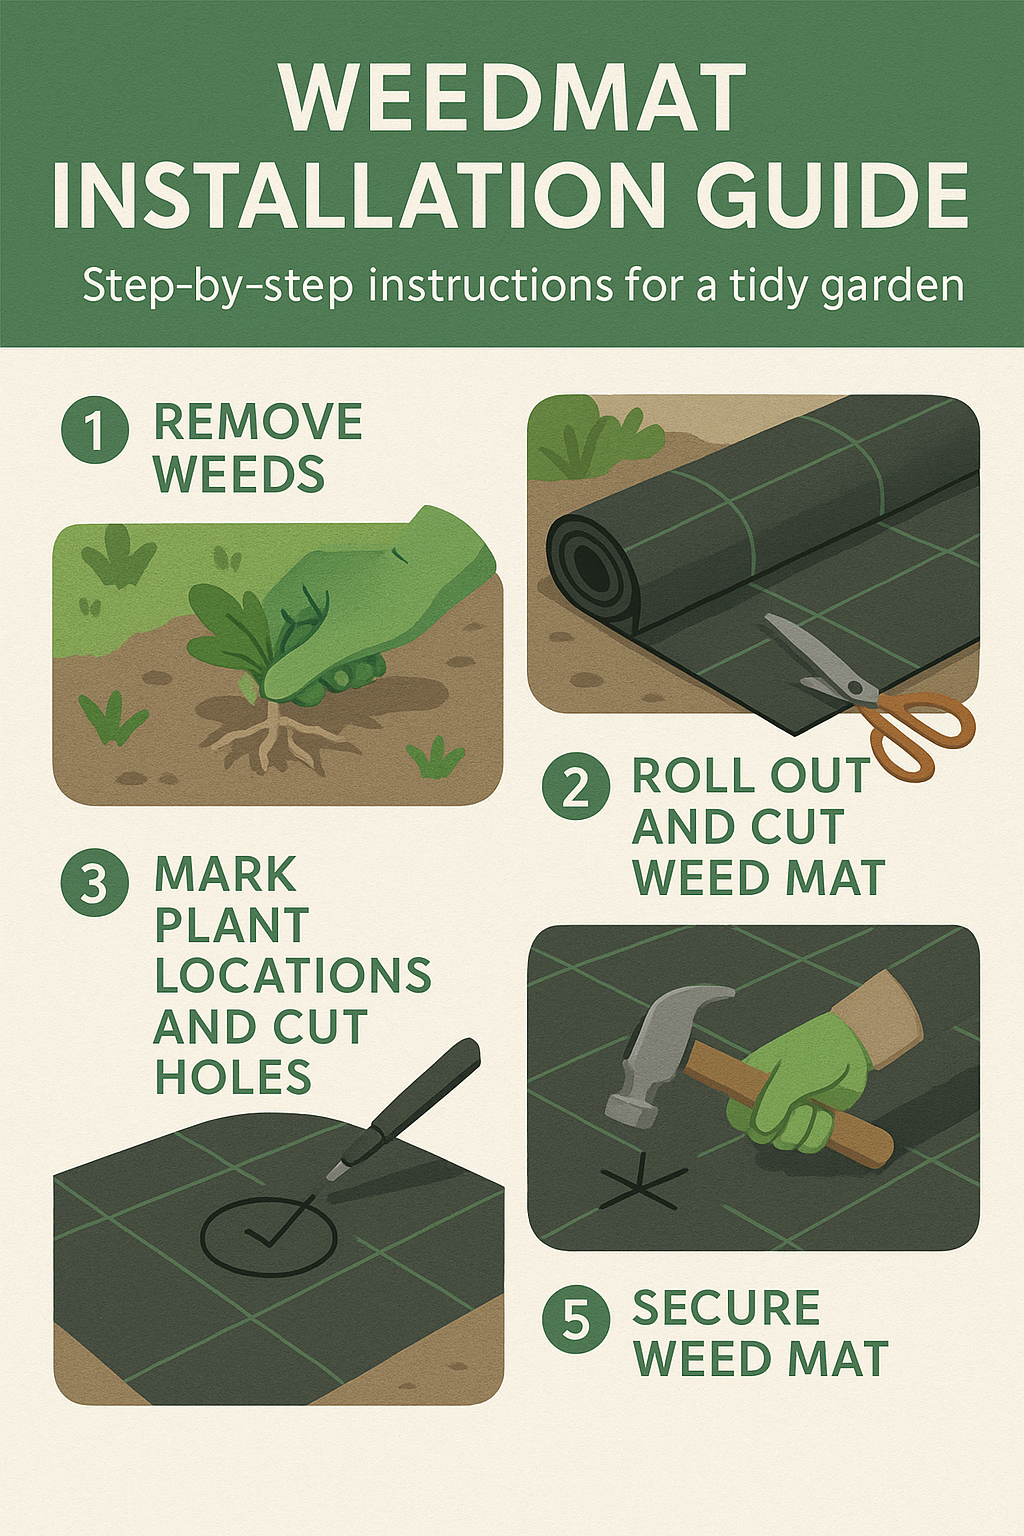
1. Remove All Weeds
Start by removing all weeds and debris from the area you want to cover. Make sure the surface is clean and level.
2. Roll Out and Cut the Weedmat
Lay the weedmat over your garden bed and trim it to size with scissors. Ensure full coverage without large gaps.
3. Mark Plant Locations and Cut Holes
Place each plant pot on the weedmat and trace a circle with a marker. Draw an “X” inside the circle, cut along the lines, and fold back the corners to create openings for planting.
4. Secure the Weedmat
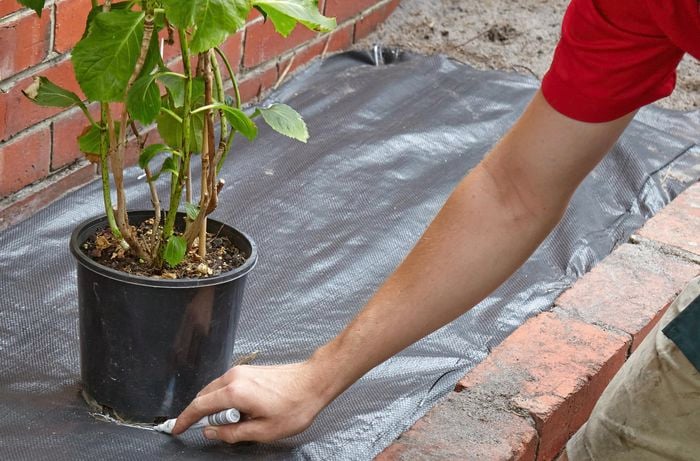
Use metal or plastic pegs to pin the weedmat to the ground. For hard soil, use a hammer to drive the pegs in securely.
5. Plant and Apply Mulch
After planting, cover the surface with 5–10cm of mulch (bark, pebbles, or wood chips). This enhances the appearance and keeps the weedmat in place while improving moisture retention.
📏 Available Sizes:
We offer 4 convenient sizes to suit different garden needs:
-
0.92m x 10m – Ideal for small garden beds
-
0.92m x 25m – Perfect for longer borders or narrow spaces
-
1.83m x 10m – Great for medium-sized areas
-
1.83m x 25m – Best for large-scale garden projects
All sizes are made from durable, breathable material that allows air and water to pass through while blocking sunlight to suppress weeds.
🌼 Why Choose Our Weedmat?
✔️ High-quality, long-lasting fabric
✔️ Easy to install and cut
✔️ UV-resistant and breathable
✔️ Suitable for home gardens, landscaping, or commercial use
Visit us in-store or contact us to order the size that best fits your garden project. Let us help you build a cleaner, greener space — one roll at a time!